How to check if email is read by user – PHP, Gmail, Outlook

Problem:

If you are developing a web project that includes sending emails to users, then it is very important for you to know if those emails are being read or delivered to those users. For example, if you are sending marketing emails to your subscriber’s list, then it is essential for you to know that your email is read by which users. And by which users the email is not read yet.

This will greatly help you to make decisions if you are sending the right emails or not. Because if the user can read your marketing email, but didn’t buy anything from you, it clearly means there was something wrong with the email. But how do you know if the email sent from PHP, Laravel, or whatever framework you are using, is being opened by the user?

Solution:

Follow this tutorial, and you will be able to add such functionality in your web project.

Sending the email:

For sending the email, you can use the popular “PHPMailer” library. You can also use built-in PHP “mail()” function. Open command prompt or Terminal in your project root folder and run the following command (make sure you have composer installed in your system):

composer require phpmailer/phpmailer

This will create a “vendor” folder in your project root folder. Create a table in your MySQL database named “emails” and it will have 4 columns:

  1. ID (INTEGER) (primary key, auto_increment, not null)
  2. email (TEXT) (not null)
  3. content (TEXT) (not null)
  4. read_at (DATETIME) (null)
How to check if email is read by user - PHP, Gmail, Outlook - Emails table
How to check if email is read by user – PHP, Gmail, Outlook – Emails table

Send email using the following code in your PHP file:

<?php

// import PHPMailer classes into the global namespace
// these must be at the top of your script, not inside a function
use PHPMailer\PHPMailer\PHPMailer;
use PHPMailer\PHPMailer\SMTP;
use PHPMailer\PHPMailer\Exception;

// load Composer's autoloader
require 'vendor/autoload.php';

// instantiation and passing `true` enables exceptions
$mail = new PHPMailer(true);

// the person who will receive the email
$recipient = "recipient_email";

// content of email
$content = "This is the HTML message body <b>in bold!</b>";

// connect with database
$conn = mysqli_connect("localhost:8889", "root", "root", "test");

// insert in mails table
$sql = "INSERT INTO emails (email, content) VALUES ('" . $recipient . "', '" . $content . "')";
mysqli_query($conn, $sql);

// get inserted mail ID
$email_id = mysqli_insert_id($conn);

// append empty image tag with email content
// this will help to know when user read that email
$base_url = "http://" . $_SERVER['HTTP_HOST'] . $_SERVER['REQUEST_URI'];
$content .= "<img src='" . $base_url . "email_read.php?email_id=" . $email_id . "' style='display: none;' />";

try {
    // disable verbose debug output
    $mail->SMTPDebug = 0;

    // send using SMTP
    $mail->isSMTP();

    // set the SMTP server to send through
    $mail->Host = 'smtp.gmail.com';

    // enable SMTP authentication
    $mail->SMTPAuth = true;

    // SMTP username
    $mail->Username = 'your_email@gmail.com';

    // SMTP password
    $mail->Password = 'your_password';

    // enable TLS encryption
    $mail->SMTPSecure = PHPMailer::ENCRYPTION_STARTTLS;

    // TCP port to connect to, use 465 for `PHPMailer::ENCRYPTION_SMTPS` above
    $mail->Port = 587;

    $mail->setFrom('your_email@gmail.com', 'Your name');

    // add a recipient
    $mail->addAddress($recipient);

    // set email format to HTML
    $mail->isHTML(true);
    $mail->Subject = 'Here is the subject';
    $mail->Body = $content;

    $mail->send();
    echo 'Message has been sent';
} catch (Exception $e) {
    echo "Message could not be sent. Mailer Error: {$mail->ErrorInfo}";
}

You just need to change the email and password with your Gmail address and password. To learn more about configuring an SMTP server, read this.

[do_widget id=custom_html-4]

This is how the email will be received in the user’s inbox (image will not be visible):

A sample mail
How to check if email is read by user – PHP, Gmail, Outlook – Inbox

View emails and time they are read:

Now, we will create a separate page for the admin where he/she can see a list of all emails sent from the website along with the time they are read by the user. Create a file named “view_emails.php” and paste the following code in it:

<?php

// connect with database
$conn = mysqli_connect("localhost:8889", "root", "root", "test");

// get all emails
$sql = "SELECT * FROM emails";
$result = mysqli_query($conn, $sql);

?>

<!-- basic style of table -->
<style>
    table, td {
        border: 1px solid black;
        border-collapse: collapse;
        padding: 25px;
    }
</style>

<table>

    <?php

    // show all emails
    while ($row = mysqli_fetch_object($result))
    {
        ?>
        <tr>
            <td><?= $row->id; ?></td>
            <td><?= $row->email; ?></td>
            <td><?= $row->content; ?></td>
            <td><?= $row->read_at == null ? "Not read" : $row->read_at; ?></td>
        </tr>
        <?php
    }

    ?>

</table>

Access this page directly and you will see a list of all emails with the time they are read (next step).

How to check if email is read by user - PHP, Gmail, Outlook - Not read
How to check if email is read by user – PHP, Gmail, Outlook – Not read

Mark the time when email is read:

Create a file named “email_read.php” and paste the following code in it:

<?php

// this page will be executed only when the email is opened by user

// connect with database
$conn = mysqli_connect("localhost:8889", "root", "root", "test");

// get email ID
$email_id = $_GET["email_id"];

// update read_at value in emails table
$sql = "UPDATE emails SET read_at = NOW() WHERE id = '" . $email_id . "'";
mysqli_query($conn, $sql);

[do_widget id=custom_html-4]

You will never see the output from this file but it will mark the time in database when the email is read.

How to check if email is read by user – PHP, Gmail, Outlook – Read

Let me know if you had any problem in following this tutorial.

[wpdm_package id=’1170′]
Preview Laravel email before sending – PHP, AJAX

Either you are sending an email in Laravel via normal form POST request or via AJAX. This tutorial will help you add functionality where you can preview Laravel email before sending it. If you are adding functionality to your Laravel project where you need to send an email, it is very important during the development to check the preview of mail before sending.

Normally, when you receive the email in your inbox, you can see how it will look to users. But if you haven’t set up your SMTP server for sending emails, then following this tutorial will save you a lot of time during development.

Create a new Laravel project

To create a new Laravel project, open your command prompt or Terminal and run the following command in it:

composer create-project laravel/laravel example-app

This will create a folder named “example-app”. Now, you need to enter this folder using the following command:

cd example-app

When your Terminal is inside this folder, run the following command to start the server:

php artisan serve

Typically, this starts your project at host 127.0.0.1 and port 8000. So you can access it from the URL:

http://127.0.0.1:8000

Create controller and mailer

Create a new controller using the following command, you can also use your own controller if you want:

php artisan make:controller UserController

Now, open your “routes/web.php” file and create a new route:

// include controller
use App\Http\Controllers\UserController;

// create route
Route::get("/send-mail", [UserController::class, "send_mail"]);

Create a mailer to send mails by running the following command in your Terminal:

php artisan make:mail SendMail

Now, we need to create the following function in “App\Http\Controllers\UserController”:

use Mail;
use App\Mail\SendMail;

class UserController extends Controller
{
    // create method
    public function send_mail()
    {
        // send email
        // preview with dynamic variable data

        $data = "This is a variable.";

        // pass as a parameter
        $mailable = new SendMail($data);
        // Mail::to("recipient@gmail.com")->send($mailable);

        // preview email
        return $mailable->render();
    }
}

Following will be the content of your “App\Mail\SendMail”. You can add all the variables you want to pass in this mailer:

<?php

namespace App\Mail;

use Illuminate\Bus\Queueable;
use Illuminate\Contracts\Queue\ShouldQueue;
use Illuminate\Mail\Mailable;
use Illuminate\Queue\SerializesModels;

class SendMail extends Mailable
{
    use Queueable, SerializesModels;

    // class data member
    public $data;

    /**
     * Create a new message instance.
     *
     * @return void
     */
    // parametrized constructor
    public function __construct($data)
    {
        // assign value
        $this->data = $data;
    }

    /**
     * Build the message.
     *
     * @return $this
     */
    public function build()
    {
        // create this folder mails
        // and file test.blade.php

        // pass value in view
        return $this->view('mails/test', [
            "data" => $this->data
        ]);
    }
}

At line #40, we need to create a new file in views folder, “resources/views/mails/test.blade.php” and in this file you can write the content of your email. For the sake of understanding, I am writing simple text with variables:

<h1>This is mail:</h1>

<!-- display in mail view -->
Data = {{ $data }}

If you access your browser at “http://127.0.0.1:8000/send-mail”, you will see the content of email with all variables rendered on it.

Preview email from AJAX

If you are sending an email via an AJAX request, then it might be difficult for you during the development to check how the email will look like. You might be sending an email on each test and viewing it from your Gmail inbox to preview the email. But there is a shorter method to do that, and it will surely save your time.

First, create a new route that will render a view file.

// routes/web.php
Route::get("/send-mail-ajax", function () {
    // render view
    return view("send_mail_ajax");
});

Create a file named “send_mail_ajax.blade.php” inside the “resources/views” folder and paste the following code into it:

<!-- meta tag for CSRF token -->
<meta name="_token" content="{{ csrf_token() }}">

<!-- hidden input field for base url -->
<input type="hidden" id="base_url" value="{{ url('/') }}" />

<!-- send ajax -->
<script>
    var ajax = new XMLHttpRequest();
    ajax.open("POST", document.getElementById("base_url").value + "/send-mail-ajax", true);

    // when the response is received
    ajax.onreadystatechange = function () {
        if (this.readyState == 4) {
            if (this.status == 200) {
                // display in browser
                document.write(this.responseText);
            }

            // handler error
            if (this.status == 500) {
                console.log(this.responseText);
            }
        }
    };

    var formData = new FormData();
    formData.append("_token", document.querySelector("meta[name=_token]").content);
    ajax.send(formData);
</script>

We have created a meta tag for saving CSRF token which is required for each POST request in Laravel, and a hidden input field that will save the website’s base URL. Then we are sending an AJAX request, and when the response is successfully received then we are displaying that in current web page.

Don’t worry, it will be used just during the development process. Once it is reviewed, then you can comment out that code at line #17.

Create a POST route in “routes/web.php” and it will use the same method in UserController, only the method is set to POST:

// create route
Route::post("/send-mail-ajax", [UserController::class, "send_mail"]);

Try to access the URL at “http://127.0.0.1:8000/send-mail-ajax”, you will first view an empty page then after few seconds, you will see the content of email in your web page.

Let me know if you need any help in following this tutorial.

[wpdm_package id=’1171′]

Laravel Blog (Website + Android app) with Admin Panel

A Laravel blog website along with an Android app is created with an admin panel. It uses the design template from https://bootstrapmade.com/. It has the following key features:

Google Adsense approved

The project is tested with Google Adsense and it was approved by Google for monetization. You just have to link with your Google account and you will start receiving money once you reach the Google payment threshold.

User side

  1. 70 built-in blog posts.
  2. Random quotations.
  3. Total users display.
  4. Custom advertisement to generate revenue.
  5. Share posts on Twitter and Facebook.
  6. Limit access to some features for registered users only.
  7. Registration with Email Verification.
  8. Secure Login.
  9. Comment on Post.
  10. Reply to the comment.
  11. Related Posts.
  12. Subscribe to the newsletter.
  13. Social Links.
  14. A section to sell items directly.
  15. Amazon affiliate links.
  16. Realtime Chat with admin (Firebase).
  17. Manage Profile.
  18. Change Password.
  19. Custom Advertisement.

Admin panel

  1. Dashboard Statistics.
  2. Add/Edit blog posts.
  3. Add/Edit items that sell directly.
  4. Manage Inbox.
  5. Manage Comments.
  6. Realtime Chat with users (Firebase).

Android app

We also developed an Android App for this project which your users can download from Google Play Store and read your blog posts from that app. Here is the demo of the Laravel blog android app:

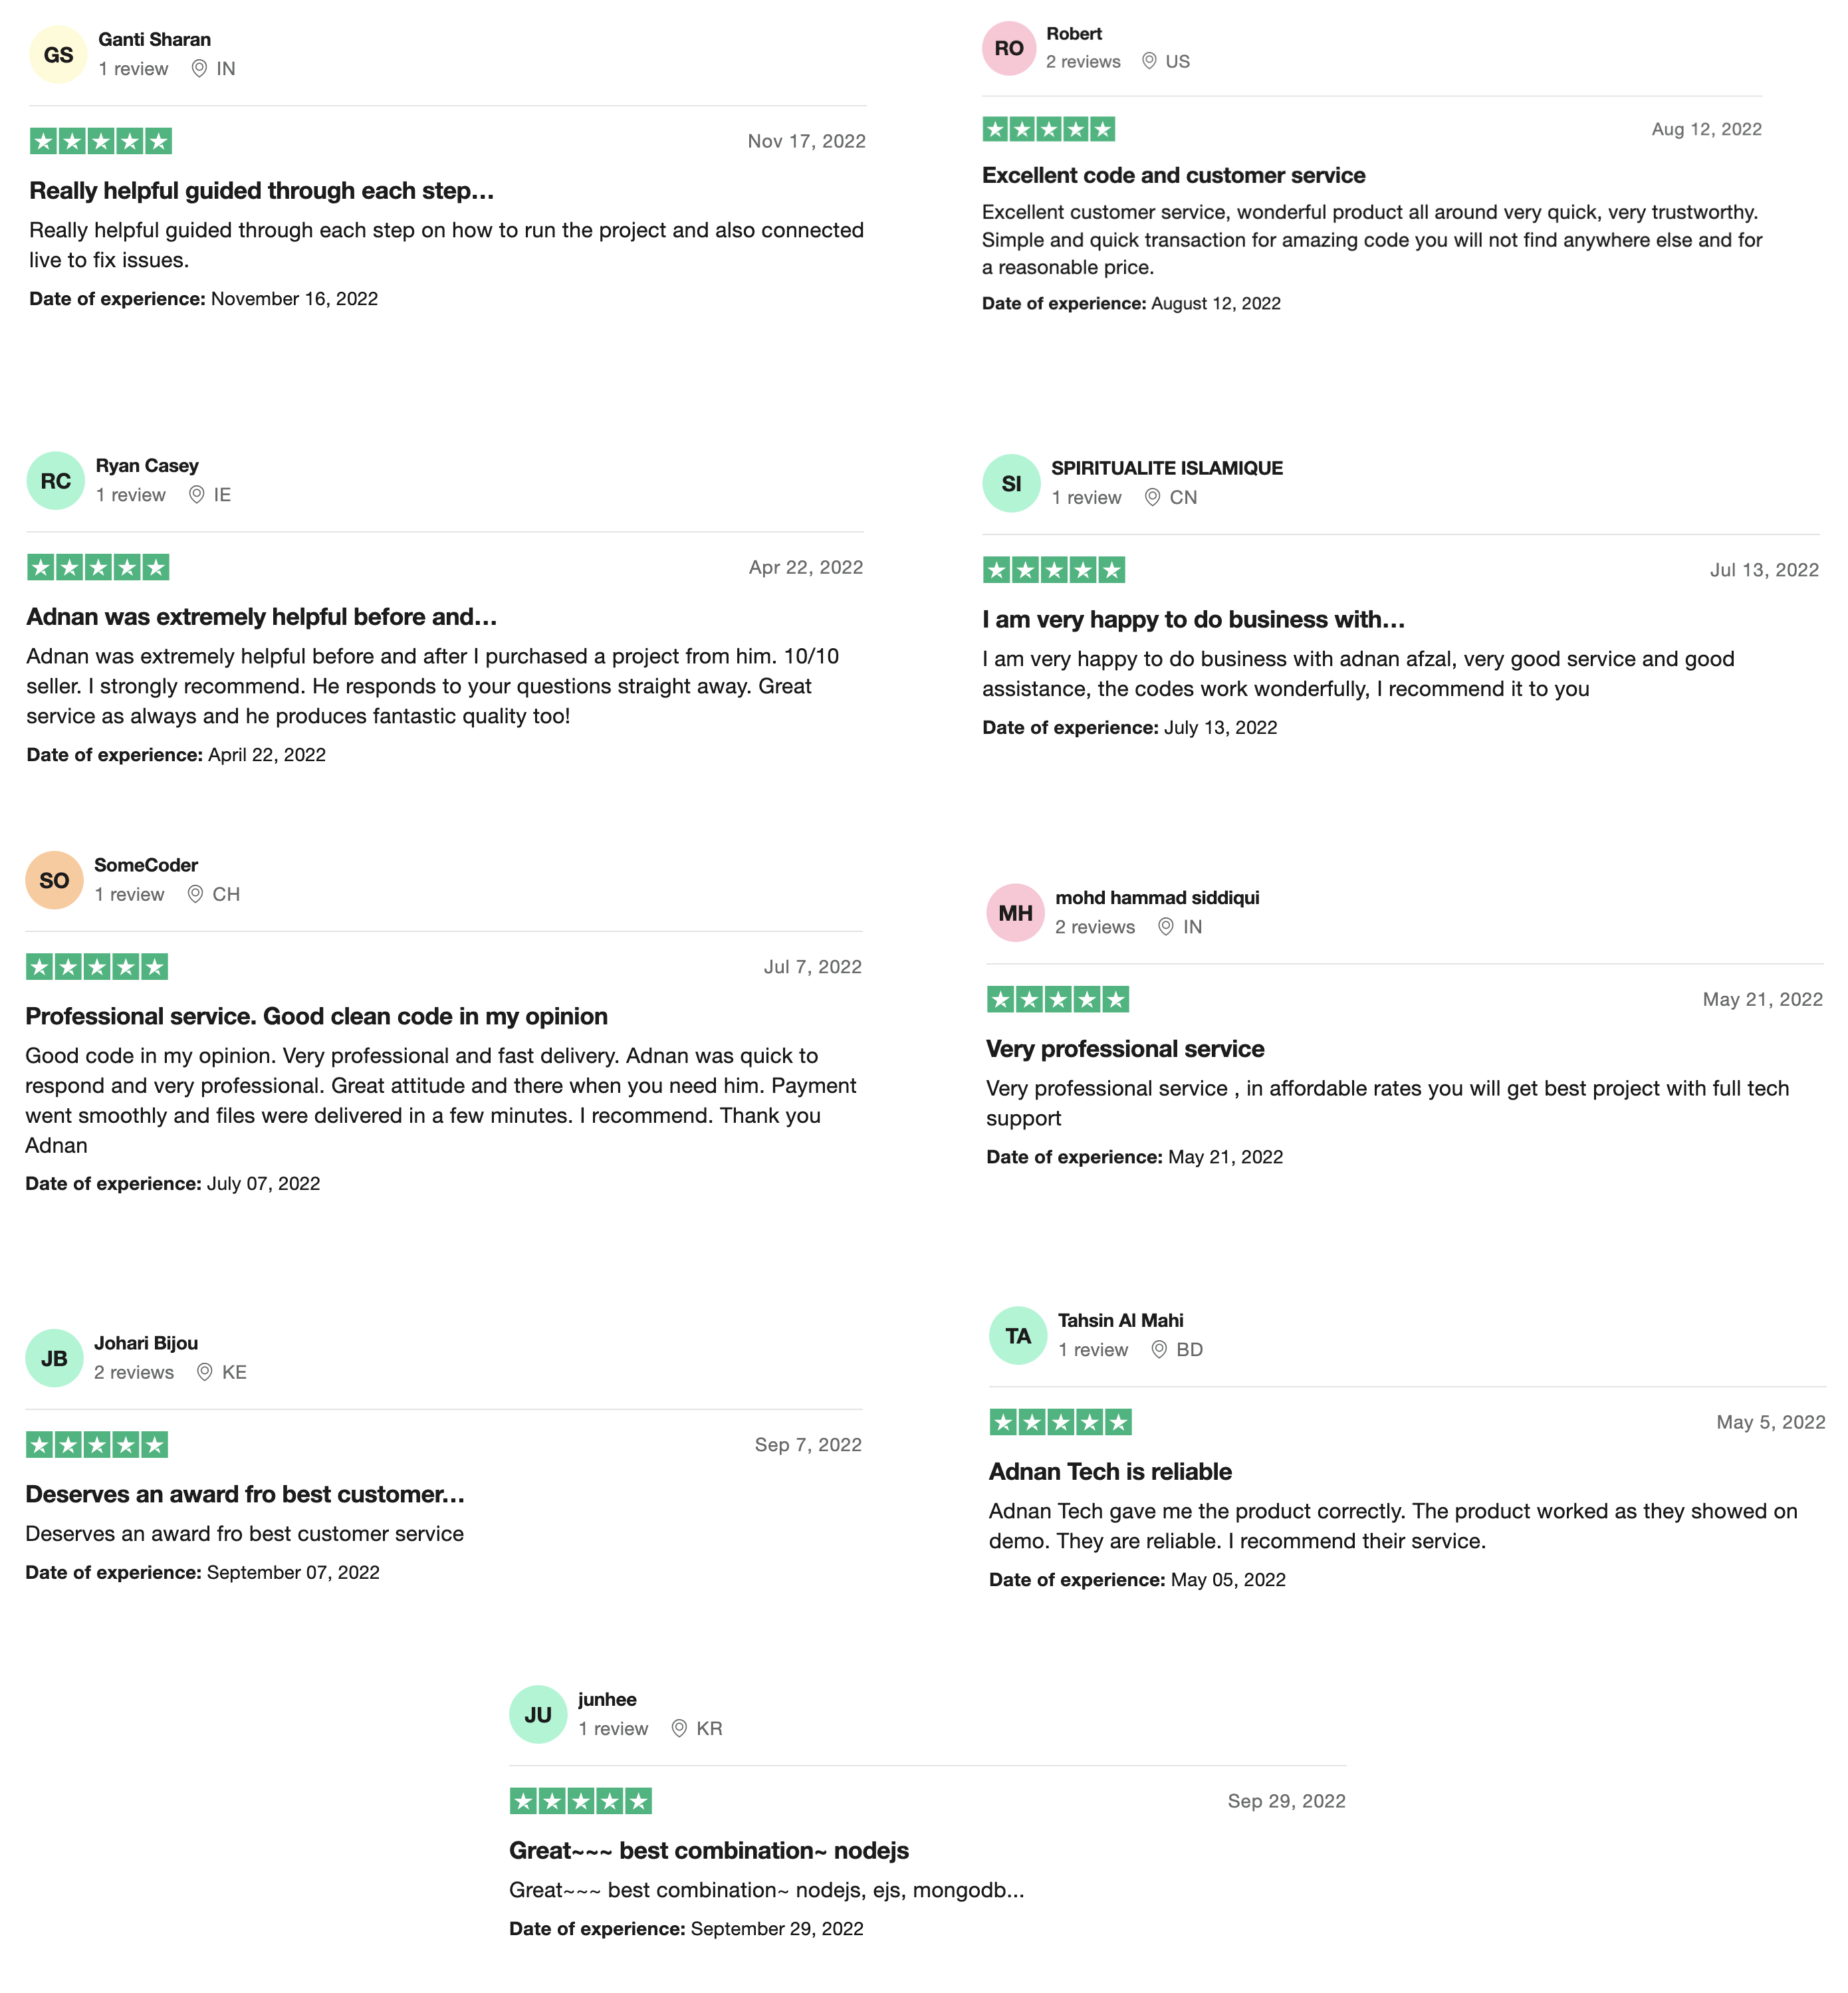
Our TrustPilot reviews

TrustPilot-reviews
TrustPilot-reviews

Hide HTML from inspect element – PHP

In this article, we are going to discuss, how you can hide HTML tags from inspect element. It prevents the HTML tags from rendering in the browser so they won’t be visible in “View page source” or “inspect element”.

When developing a web application, sometimes you write a code to do something. But after some time, you find a better algorithm for that solution, and your comment on the previous code, and apply the new algorithm.

We comment on the code because we feared that we might need that code somewhere else in the project and we do not want to waste our time and effort we put into writing that code.

The only problem with commenting on the code is that the HTML tags created with that code are still visible from inspect element. They might not be sensitive but sometimes you just do not want it to show to the user. Someone with good coding knowledge can see your commented HTML codes.

Demonstration

I am going to create a loop from 1 to 10 and create a paragraph in each iteration. You might be displaying data from the database using foreach or while loop and might be displaying in tables, cards, or any other layout. After that, I am going to comment on the paragraph inside the loop.

<?php for ($a = 1; $a <= 10; $a++) { ?>
    <!-- <p>I am commented <?php echo $a; ?></p> -->
<?php } ?>
 
<p>I am normal.</p>

Right now, you will only see the “I am normal” text, but if you right-click on the empty area of your screen and click “View page source”, you will see the commented paragraphs.

Commented code – PHP

To prevent those commented paragraphs to appear in “page source” or “inspect element”, simply wrap the code you don’t want to display in the if condition. And set the condition to never be true.

<?php for ($a = 1; $a <= 10; $a++) { ?>
    
    <?php if (false) { ?>
        <p>I am commented <?php echo $a; ?></p>
    <?php } ?>

<?php } ?>

<p>I am normal.</p>

If you open the page source now, you will no longer see the commented paragraphs. That is how you can hide HTML from inspect element.

Code not executed – PHP

File Transfer Web App (Node JS + Mongo DB) – Express

Introduction

In this article, we are going to introduce you to a project “File transfer web app” we created in Node JS and Mongo DB. It is a file transferring web app that allows you to send files to your colleagues, friends, clients, etc.

FeaturesFreePremium
Login and registrationYesYes
Upload filesYesYes
Download filesYesYes
Delete filesYesYes
Share Files publicly via linkYesYes
Email verificationNoYes
Reset passwordNoYes
Create foldersNoYes
Private file sharingNoYes
Rename files & foldersNoYes
Move filesNoYes
Search filesNoYes
Stripe and PayPalNoYes
Blog integrationNoYes
Image compressionNoYes

Demo

1. Upload files

You can upload any type of file (image, e-book, executable, iso), the system will NOT prevent you from uploading any certain type of file. Uploaded files are in original quality (no compression is done), and they can be deleted at any time by the uploader.

2. Create folders

To organize your files, you can create folders and upload files to that folder. For example, you can create a folder named “College data” and in that folder create further sub-folders “Assignments”, “Thesis”, “Projects” and upload relevant files in each folder separately. You can go for an infinite level of sub-folders, this project can handle that.

3. Shareable link (public)

You can share files via a publicly shareable link. Anyone with the link can access your file with or without creating an account. You can also remove the shareable links so they won’t be accessible to the public anymore. There is no expiry time for the shareable link, it will remain accessible as long as it is deleted by the owner.

4. Share by E-mail (private)

You can share files via E-mail address if the receiver already has an account in the system. To share files privately, the receiver must have a registered and verified account. Files shared via E-mail will not be accessible by any other person, even if someone tries to get them from the server directory.

5. Move files & folders

You can move files from one folder to another with all sub-folders in it. When a file is moved to a new location, all publicly shareable links will lose access to that file. This is another way of removing access to shared links.

6. Rename files & folders

The name of the file is automatically set when the file is uploaded, but you can always rename the file. There is no restriction on setting the name of the file, you can even type special characters (!@#$%^&*) in it.

7. Search

You can search all files and folders uploaded by you or shared by others by their name with you. This allows you to quickly find the files uploaded by you or shared with you by your friends or colleagues.

8. Download counts

Files shared via a public link can be downloaded by anyone if he/she has the link. They do not need to register or log in to an account to download that file. While you are logged in can see the number of times that file is downloaded.

9. Recycle bin or trash can

When you delete a file, it automatically goes into the recycle bin or trash can. From where you can restore a file if you have deleted it by mistake or you can delete it permanently. Trashed files will not take your space. But when you try to restore it, you must have enough space in your account.

10. Backup

Your users will be able to take a backup of all of their files with a single click.

11. Business model

You can also make money with this project. You can allow users to upload files up to some GBs for free. After that, you can ask them to pay to upload more data. For example, you can allow users to upload up to 1 GB of files, and put the price of $1 per extra GB. I have added the Stripe and PayPal payment methods that allow you to quickly get money without integrating these payment methods for your convenience.

You just have to change the API keys for Stripe and PayPal and sit back and wait for payments. When someone makes a payment, it will automatically be added to your account and he will automatically get more data to upload. You can allocate a fixed amount from that income to increase your hosting’s hard drives. So your investment in this project will be just $10, which is the price of this project. Future investments will be received from your users.

12. Blog integration

Initially, this project was just a file transfer web app. But since you are not restricted to add more features. Now you can share the latest news and articles on your website. Simply go to the admin panel and add blog posts and it will automatically start seeing them on the user side. You can also edit or remove posts from your blog anytime you want.

13. Image compression

Now, you can compress your images to reduce their size without losing the quality. When the size is reduced, you will automatically be able to upload more images because you will be using less storage. A test run indicates that an image of 3.2 MB can be reduced to just 890 KB without having to lose too much quality. Check out our tutorial on image compression in Node JS.

14. Security

Your files will not be accessible by any person other than you or the people you have shared with. Even if someone finds the directory where you have stored all your files, he will still be unable to list or view the files.

15. Data volume

There is no limit on the volume of data uploaded in this system. You can upload as much larger files as your server allows, and you can upload as many files as needed. You can also create infinite levels of folders and sub-folders.

Free version:

This file transfer web app project comes in a freemium model. This means you can download the free version with basic functionality. To get the advanced features, you can buy it’s premium version.

https://github.com/adnanafzal565/file-transfer-web-app-nodejs-mongodb

Our TrustPilot reviews

TrustPilot-reviews
TrustPilot-reviews

Realtime customer support chat widget – PHP, Javascript, MySQL, Node JS

In this article, we are going to teach you how you can create a real-time customer support chat widget on your website. Users will be able to chat with the admin and get instant replies. All messages will be stored in the MySQL database.

By real-time, we mean that users or admins do not have to refresh the page to see new messages. Also, the admin will be able to view the navigation history of the user. For example, how many and which pages the user has visited, what was the last page the user has visited etc.

Tutorial:

Source code:

After buying this project, you will get the complete source code and use it in as many websites as you want.

Our Trustpilot reviews

TrustPilot-reviews
TrustPilot-reviews

Feedback pop-up bootstrap modal – Javascript, PHP & MySQL

In this article, we will teach you how to create a feedback pop-up bootstrap modal for users on the bottom right of the screen when the page is fully loaded. The pop-up modal will be created in bootstrap and will display a star rating and an input field to get the user’s feedback. Once submitted, it will display a thank you message and the user’s feedback will be saved in a database along with his IP address and browser information. If you are working on localhost, you might see the IP address as ::1. Don’t worry about it, on the live server it will save the actual IP address of the user.

Once the feedback is sent, the user will not see that pop-up again. If the user changes the browser or visits the site after a long time, then he will see that pop-up again.

Download jQuery, bootstrap, and font-awesome

First, you need to download jquery, bootstrap, and font-awesome. You can download all of them from the attachment below. Paste the CSS and JS files of bootstrap into your project. You may also need to copy-paste the jQuery JS file as well. Make sure to copy the font awesome fonts and CSS file as well.

Now you need to include these files in your project. Create <link> tag for adding CSS files and <script> tag for adding JS files.

<link rel="stylesheet" type="text/css" href="css/bootstrap.min.css" />
<link rel="stylesheet" type="text/css" href="css/font-awesome.min.css" />

<script src="js/jquery-3.3.1.min.js"></script>
<script src="js/bootstrap.min.js"></script>

Refresh the page, and if you did not see any error in the browser’s console window, then it means that it is included correctly.

Feedback modal/pop-up

Now, create a bootstrap modal for feedback. Give your modal a unique ID that will be used to show and hide the modal programmatically. The modal will have a heading, and one button to close the modal. And a body, where we will create the form to get the feedback.

<div class="modal custom" id="feedbackModal">
    <div class="modal-dialog">
        <div class="modal-content">

            <div class="modal-header">
                <h3>Rate your feedback</h3>
                <button type="button" class="close" data-dismiss="modal">
                    <span>×</span>
                </button>
            </div>

            <div class="modal-body">
                <form onsubmit="return saveFeedback(this);">
                    <div class='starrr'></div>

                    <div class="form-group" style="margin-top: 10px;">
                        <input type="text" name="feedback" class="form-control" />
                    </div>

                    <input type="submit" class="btn btn-primary pull-right" value="Submit" />
                </form>
            </div>
        </div>
    </div>
</div>

On form submit we will call an AJAX to save the feedback. A <div> to show stars, an input field to enter feedback in text, and a submit button. Right now, you will not see the stars, it will be done in the next section.

We need to show the modal on the bottom right, so apply some CSS styles to it.

#feedbackModal.modal.custom .modal-dialog {
    width: 50%;
    position: fixed;
    bottom: 0;
    right: 0;
    margin: 0;
}

This will give it some width for the form, set the position on the bottom right, and remove the margin from the bottom and right of the screen.

Star ratings (starrr)

Now, to create stars, we are going to use a library called starrr. Goto, this GitHub link to download the library and download it in your system. Inside this library, go to the distribution folder named dist and copy the CSS and JS files in your project’s CSS and JS folder separately. Now include its CSS and JS files and make sure to include the JS file after jQuery. I am putting it even after bootstrap JS.

<link rel="stylesheet" type="text/css" href="css/starrr.css" />
<script src="js/starrr.js"></script>

If you still see the stars missing, even though you have included font-awesome in your project, it is because you need to initiate this library using Javascript.

var ratings = 0;

window.addEventListener("load", function () {
    $(".starrr").starrr().on("starrr:change", function (event, value) {
        ratings = value;
    });

    if (localStorage.getItem("feedback_1") == null) {
        $("#feedbackModal").modal("show").on('hidden.bs.modal', function (e) {
            localStorage.setItem("feedback_1", "1");
        });
    }
});

Setting the default value of ratings to 0. We will initiate the library when the page is fully loaded. When the user selects any star, we are going to save its value in the ratings variable. Now I need to show the modal automatically but only if the user has not given his feedback. So I will use local storage for this purpose. In line #8, I am checking if the local storage has feedback_1 value. If not, then I am going to show the modal, and when this modal is closed by the user, I am going to save the feedback_1 value in local storage. So next time the user visits this page, the feedback_1 value will be found in local storage, thus it will not show the modal pop-up.

Refresh the page and now you will see that a feedback pop-up, that is created via a bootstrap modal, will be displayed automatically.

Submit form using AJAX

Now, we need to create a Javascript function named saveFeedback() which will be called when the form is submitted. This function will create an AJAX object, set its method to POST, and URL to the page that will save the feedback, and make the request asynchronous.

Then attach an event that will be called whenever the state of request is changed. The ready state will be 4 when the request is completed and a response is received. The status will be 200 if the response was OK and there was no error. You can simply show the response sent from the server using the responseText property. Then show the thank you message in the modal pop-up, and save the value in local storage.

If the request’s status is 500, it means there is an internal server error. In that case, you can view the error using the responseText property. To send the AJAX request, you need to create a FormData object using your form and append the ratings variable value in it, and then send the request and attach the form data object to it. return false at the end of the function will prevent the form from submitting and refreshing the page.

function saveFeedback(form) {
    var ajax = new XMLHttpRequest();
    ajax.open("POST", "save-feedback.php", true);

    ajax.onreadystatechange = function () {
        if (this.readyState == 4) {
            if (this.status == 200) {
                console.log(this.responseText);

                document.querySelector("#feedbackModal .modal-body").innerHTML = "Thank you for your feedback.";
                localStorage.setItem("feedback_1", "1");
            }

            if (this.status == 500) {
                console.log(this.responseText);
            }
        }
    };

    var formData = new FormData(form);
    formData.append("ratings", ratings);
    ajax.send(formData);

    return false;
}

Handle AJAX request

Now create a server file named save-feedback.php that will handle this request. As the requests need to be saved in the database, so we need to create a table in our database. I am creating a table named feedbacks. It will have 6 columns (id, IP, browser, ratings, feedback, created_at). The first will be auto increment ID. The second is an IP address whose data type is TEXT. Third is browser information, also TEXT. The fourth is ratings” data type DOUBLE. Next is feedback, also TEXT. And finally, created_at will store the date and time when the feedback is sent and its data type will be DATETIME.

You can find the SQL file in the attachment below.

Save feedback in MySQL

First, connect with the database. My database name is “tests”. Then get ratings and feedback from the request. You can get the user’s IP address using the PHP built-in global $_SERVER variable, and the associative index will be REMOTE_ADDR. You can get the user’s browser information by calling a PHP built-in function named get_browser() and it has a property named browser_name_pattern. Then run the INSERT query to save the record in the database. MySQL has a built-in function named NOW() that will return the current date and time of the server. PHP echo will send the response back to the client.

<?php

    $conn = mysqli_connect("localhost:8889", "root", "root", "test");

    $ratings = $_POST["ratings"];
    $feedback = $_POST["feedback"];
    $ip = $_SERVER["REMOTE_ADDR"];

    $browser = get_browser()->browser_name_pattern;

    mysqli_query($conn, "INSERT INTO `feedbacks`(`ip`, `browser`, `ratings`, `feedback`, `created_at`) VALUES ('" . $ip . "', '" . $browser . "', '" . $ratings . "', '" . $feedback . "', NOW())");

    echo "Done";

?>

Explanation

Initially, the feedback table will be empty. When you refresh the page, give ratings using stars, enter feedback and hit submit button, then a “Thank you” message will be displayed. When the response is successfully received from the server, close the modal and check your “feedbacks” table using phpMyAdmin. You will see a new row created in the database. If you refresh the page again, you won’t be able to see this modal because you have already given your feedback. You can try it in another browser. The first time you will see the pop-up on the bottom right corner. Once feedback is given, then you will not see that pop-up again. And your ratings will be saved in the database.

That’s how you can create a bootstrap modal that will be used to collect feedback from the users using a pop-up.

[wpdm_package id=’1030′]

Prevent browser cache from CSS, JS, and image files

In this article, I am going to teach you, how you can prevent the browser cache from keep displaying the old content. We will ask the browser to update your cached files and fetch the fresh content. Suppose, you have written a Javascript file named “script.js”. Now, you added some functionality code in that file, or change the algorithm of some function. You have updated the file on a live server. But your changes will not affect your user’s side if their browser has cached that JS file.

How browser cache works

In that case, you have to forcefully tell the browser to fetch the updated file instead of serving the cached file. The browser cache works in such a manner that, whenever a CSS, JS, or image file is rendered in the client’s browser, the browser stores the URL of that file in its cache along with its content. When the user refreshes the page, all <style>, <script> and <img /> tags request the resources using the “href” and “src” attribute. The browser checks if the requested URL already exists in its cache database. If “yes” then it (browser) fetches its content from the cache database and serves it.

That’s why most of the time your website users are not able to view the updated content. As you now know the problem, you now have a solution. The browser searches the URL in its cache database. So, whenever you update your file, simply change the URL by appending a query parameter at the end of the URL. For example, if you have an image tag which is displaying an image named “1.jpg”, like this:

<img src="1.jpg" />

Skip cache and fetch fresh content

Now, you have replaced the “1.jpg” image with a new image and you want the user’s to view the new image, then simply change the URL like this:

<img src="1.jpg?v=1" />

Here, “v” stands for “version” but you can use any parameter you want. Make sure to append it with “?” so it will be treated as a parameter. Its sole purpose is to tell the browser that the URL has now changed. So, it must fetch the updated resource instead of from the cache database. Now, every time you change the image file, simply increment this version value like “?v=2” and the image will be updated for all users next time they refresh the page.

If you want the browser to never cache a specific resource, for example, you want the web browser to always serve the updated “1.jpg” file. In that case, append the PHP timestamp in the query parameter. A PHP timestamp is the number of seconds passed from the 1st of January 1970 till the current time.

<img src="1.jpg?v=<?php echo time(); ?>" />

This will prevent the browser to never cache this image. Because every time user sends a request for this resource, the URL will change each time.

See this in action

Get URL query parameter value in Javascript

In this article, I am going to teach you, how you can get the URL query parameter value in Javascript. You can easily get the URL parameter in PHP using PHP’s built-in global $_GET array and pass the associative index as the name of the parameter. But getting that value in Javascript is a bit tricky. So I am going to show you a method that is very simple and will always work.

  1. Create a hidden input field.
  2. Give it a unique ID so it can be accessible in Javascript.
  3. Set its value as the variable you are receiving from the URL using the $_GET array.
  4. Array index will be the name of the parameter as in the URL

Suppose, you are receiving a parameter named “data” in your URL.

<input type="hidden" id="data" value="<?php echo $_GET['data']; ?>" />

Now, create a Javascript tag. You should execute all your Javascript code when the page is fully loaded. So, attach a “load” listener to the window object. You can also use the onload event but it will override the previous event. I have written a detailed post on the difference between onload event and “load” event listener.

window.addEventListener("load", function () {
    var data = document.getElementById("data").value;
    console.log(data);
});

The callback function in the second parameter of the addEventListener function will be called when the page is fully loaded. Now you simply need to get the value of this hidden input field using its ID and get the value attribute. I am logging the value of the data variable in the console.

Now, if you refresh the page then you will see this parameter (data) value in the console using Javascript. That’s how you can get the query parameter from the URL in your Javascript code.